
Table of Contents
- What You'll Need Before You Start
- How to Identify the Type of Break in a Necklace Chain
- Step-by-Step: How to Repair a Broken Necklace Chain
- Best Jewellery Pliers for Repairs
- Repairing Different Chain Styles: Cable, Box, and Snake
- When to Take Jewellery to a Professional Goldsmith
- Jewellery Repair Cost UK: What Affects the Price
- Common Mistakes and Troubleshooting Failed Repairs
- Frequently Asked Questions
Last Updated: September 22, 2026
What You'll Need Before You Start
A broken chain is rarely a disaster. Knowing how to repair a broken necklace chain step by step starts here: most snaps happen at the clasp or a jump ring, both fixable at a kitchen table with the right tools. At Morgan Banks, we have repaired chains since 1935.
Before you touch the chain, gather these items:
- Two pairs of needle-nose pliers (one fine-tip, one standard)
- Side cutters for trimming wire or damaged links
- A jeweller's loupe or magnifying glass
- A soft polishing cloth
- A small tray or dish to catch loose links
- Good overhead light, ideally daylight
How to Identify the Type of Break in a Necklace Chain
The repair method depends on where the chain failed. Four breaks are common:
- Open jump ring - the ring has pulled apart but is not snapped
- Snapped link - a link in the chain body has broken
- Clasp failure - the lobster claw or spring ring no longer closes
- Worn link closure - the link has stretched and no longer holds tension
Step-by-Step: How to Repair a Broken Necklace Chain
Here is the core method for how to repair a broken necklace chain step by step. Most simple breaks take under ten minutes once you are set up.
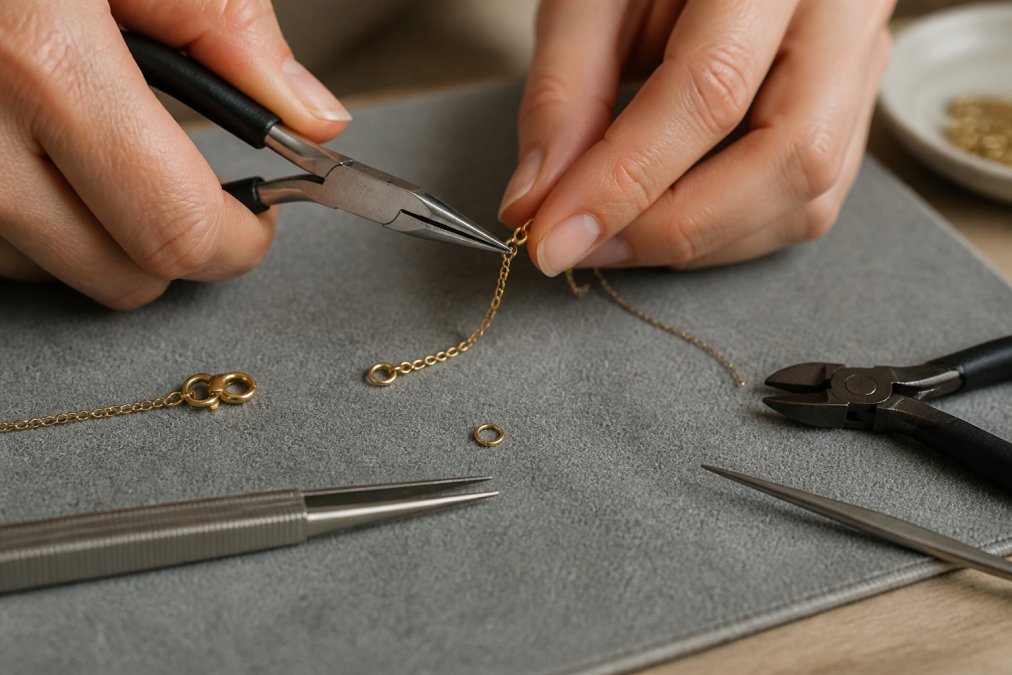
- Lay the chain flat on your tray and find both broken ends.
- Check the metal type. Gold, silver and platinum bend; base metal often snaps.
- Grip one side of the jump ring with your fine-tip pliers.
- Grip the other side with your second pair.
- Twist gently in opposite directions to open the ring, never pull it sideways.
- Hook the ring through both chain ends.
- Close the ring with the same twisting motion until the ends meet flush.
- Check the seam with your loupe. Any gap will catch on clothing and reopen.
Re-attaching Jump Rings and Re-threading the Chain
If a link has snapped mid-chain, re-thread a new jump ring through the two surviving links. Choose a ring of matching wire gauge and colour, a thin ring on a heavy chain will fail within weeks. Slide it through both end links, close it as above, then tug gently; if it opens, the ring is too soft.
Cleaning and Polishing the Chain After Repair
Repaired metal carries skin oils and tarnish. Wipe the chain with a polishing cloth once the join is secure. For deeper tarnish, a jeweller's dip works on silver and gold, but keep it away from glued stones. Dry fully before wearing.
Best Jewellery Pliers for Repairs
The best jewellery pliers for repairs are fine-tip needle-nose pliers with smooth jaws. Smooth jaws matter more than brand. Serrated jaws leave marks that no polishing cloth will remove.
Look for:
- Smooth, tapered jaws for jump rings and small links
- A spring return to reduce hand fatigue
- Comfortable grips if you repair often
- A second pair for holding the opposite side of a ring
Repairing Different Chain Styles: Cable, Box, and Snake
Not every chain repairs the same way. The style dictates the method, and the metal dictates whether a cold connection will hold. Use the table below as a diagnostic, then read the notes underneath.
| Chain Style | How to Identify It | Common Break | DIY Friendly? | Best Fix | Metal Limitation |
|---|---|---|---|---|---|
| Cable | Round or oval links, each separate, all facing the same way | Open jump ring | Yes | Close or replace ring | Any metal; gold-filled and sterling both fine with cold connection |
| Curb | Flattened links that interlock and lie flat, often diamond-cut | Clasp failure | Yes | Swap the clasp | Avoid heat on gold-filled; solder will bleed through the cladding |
| Rope | Twisted, rope-like links that spiral | Worn link | Sometimes | Replace single link | Sterling silver work-hardens; repeated bending snaps it |
| Box | Square links that lock together into a solid line | Snapped link | Rarely | Professional soldering | Costume jewellery often has a base-metal core that will not take solder |
| Snake | Tightly fitted plates with no visible links | Stretched links | No | Professional rebuild | Gold-filled snake chains cannot be re-plated at home; a repair will always show |
| Herringbone | Flat, angled links that lie completely flat | Kinked or snapped section | No | Professional rebuild or replace | The flat profile means any solder joint is visible from the front |
Why the Metal Matters as Much as the Style
Most guides treat every chain as solid gold. In practice, the metal determines whether a cold connection will hold or whether you need solder, and solder is not a home job.
- Solid gold and platinum take solder cleanly, but platinum needs far higher heat than gold and belongs in a workshop.
- Sterling silver solders easily but work-hardens with every bend. A silver chain that has been repaired twice is weaker than one that has never been touched.
- Gold-filled (a thick gold layer bonded to brass) cannot be soldered without ruining the cladding. Cold connections only.
- Gold-plated and costume jewellery usually has a base-metal core that will not accept solder. If the break is mid-chain rather than at a jump ring, the piece is often not repairable.
- Stainless steel and titanium chains are strong but cannot be soldered with standard jewellery solder; they need laser welding, which is a workshop process.
When to Take Jewellery to a Professional Goldsmith
Take the piece to a professional goldsmith when the break involves soldering, laser welding or a stone setting. These jobs need a torch, flux, solder paste and controlled heat, none belong on a kitchen table.
Book a professional repair if:
- The chain is box, snake, or herringbone
- A stone is loose or missing near the break
- The metal is platinum (it needs far higher heat than gold)
- The chain is antique or has sentimental value
- Your own repair has already failed once
Jewellery Repair Cost UK: What Affects the Price
Jewellery repair cost varies widely. The figure is built from four things: the metal, the method, the parts and the risk. Understanding how each moves the price lets you judge whether a quote is fair.
The Four Cost Drivers
1. Metal type. Platinum and white gold cost more to work than yellow gold: platinum needs far higher heat, and white gold usually needs re-rhodium plating after soldering. Yellow gold and sterling silver are the cheapest precious metals to repair.
What Typically Pushes a Quote Up
- Soldering rather than a cold connection, the single biggest factor
- Platinum, higher heat, slower work, specialist equipment
- White gold, soldering dulls the rhodium, so re-plating is usually added
- Stones near the break, removal and re-setting add time and risk
- Box, snake, or herringbone chains, these need soldering or rebuilding, never a hand-closed link
- Rush turnaround, most workshops charge a premium to jump the queue
- Antique or obsolete fittings, sourcing a matching clasp can take weeks
What Typically Keeps a Quote Low
- Cable or curb chain with a broken jump ring, a cold-connection job, often done while you wait
- Clasp replacement on a standard chain, a stock part and a few minutes of labour
- Yellow gold or sterling silver, the cheapest precious metals to work
- No stones anywhere near the break, no removal, no re-setting
How to Judge a Quote
Ask for a written quote before any work starts. A reputable jeweller will inspect the piece under magnification, explain what is needed and why, and confirm the price in writing. Be wary of any quote given without seeing the chain, the metal type alone can change the job from a five-minute cold connection to a soldered repair.
Ask three questions:
- Is this a cold connection or a soldered repair? The answer tells you most of the price.
- Is the replacement part solid gold, gold-filled, or base metal? A cheap clasp on a fine chain will fail within months.
- Will the repair be visible? On box, snake, and herringbone chains, an honest jeweller will say yes.
Common Mistakes and Troubleshooting Failed Repairs
Most failed repairs trace back to a handful of errors. Here is how to spot them and what to do instead.
- Pulling a jump ring open instead of twisting. This distorts the ring into an oval that never closes flush. Always twist.
- Using pliers with serrated jaws. The teeth nick the metal and create a stress point.
- Mismatching wire gauge. A thin replacement ring on a heavy chain will open under its own weight.
- Skipping the seam check. A ring that looks closed may still have a hairline gap.
- Heating metal without flux. The solder will not flow and the join will be weak.
- Repairing a box chain by hand. These need soldering; a hand-closed link will fail within days.
Frequently Asked Questions
How to fix a snapped necklace chain at home?
For a break at the clasp or jump ring, use needle-nose pliers to open the jump ring, re-thread the chain end, and close it flush. If the chain itself has snapped mid-link, a cold connection with a replacement jump ring can work on sturdier chains, but fine or hollow links usually need soldering. Work on a clean, well-lit surface and keep a polishing cloth nearby to remove fingerprints once finished.
Can a snapped chain be fixed?
Most chains can be repaired, though the method depends on the metal and link style. Sterling silver and solid gold chains respond well to soldering by a goldsmith, while plated or base metal chains often cannot be soldered without damaging the finish. Very thin snake or box chains may be more economical to replace than repair. A jeweller can assess the break and advise whether repair preserves the chain's integrity.
How much does it cost to get a broken necklace chain fixed?
Jewellery repair cost varies by metal, chain style, and the type of work needed. A simple jump ring replacement costs less than soldering a snapped link, and precious metal repairs cost more than base metal. Laser welding or torch soldering on fine chains takes skill and time, which affects the price. Ask your goldsmith for a quote before work begins so there are no surprises.
What tools do I need to repair jewellery at home?
The basics are needle-nose pliers, side cutters, and a jeweller's screwdriver set. For chain work, a mandrel helps shape jump rings and a polishing cloth restores shine after handling. Good lighting and a tray to catch small parts are essential.